How to Use L.TREE
Important Note:
L.TREE is not available for free accounts.
This feature is included in specific LutinX licenses or can be purchased separately from the Shop section inside your dashboard.
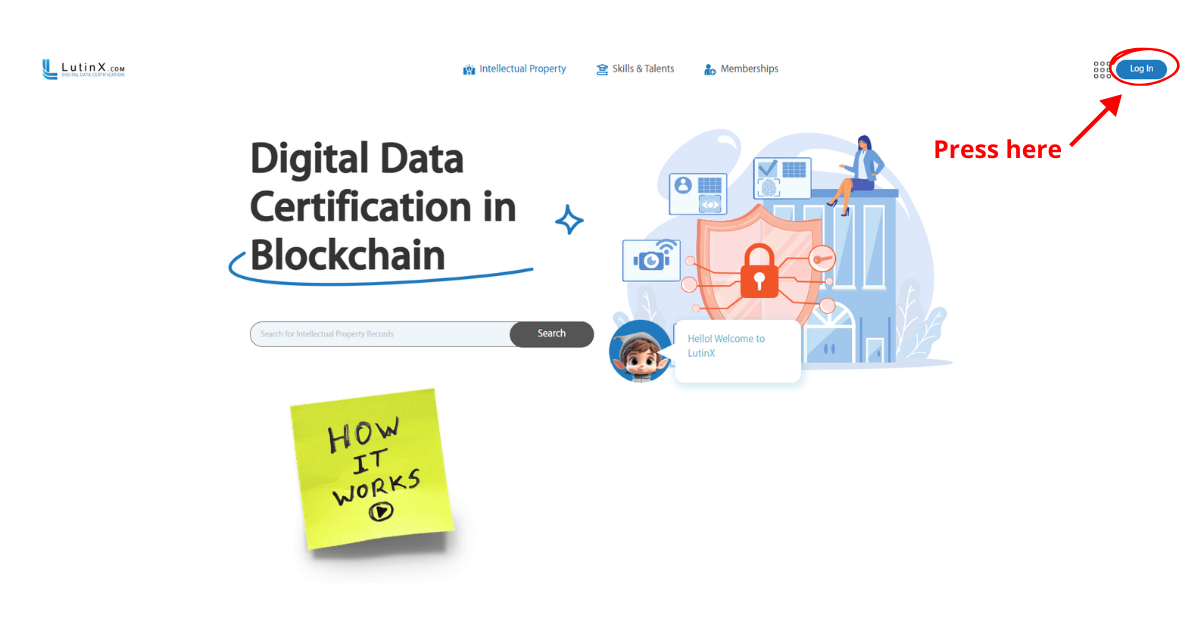
Step 1 — Create or access your account
To use L.TREE you must have a personal or a business LutinX account.
If you create a new account, completing KYC/KYB verification is recommended to become a fully identified user.
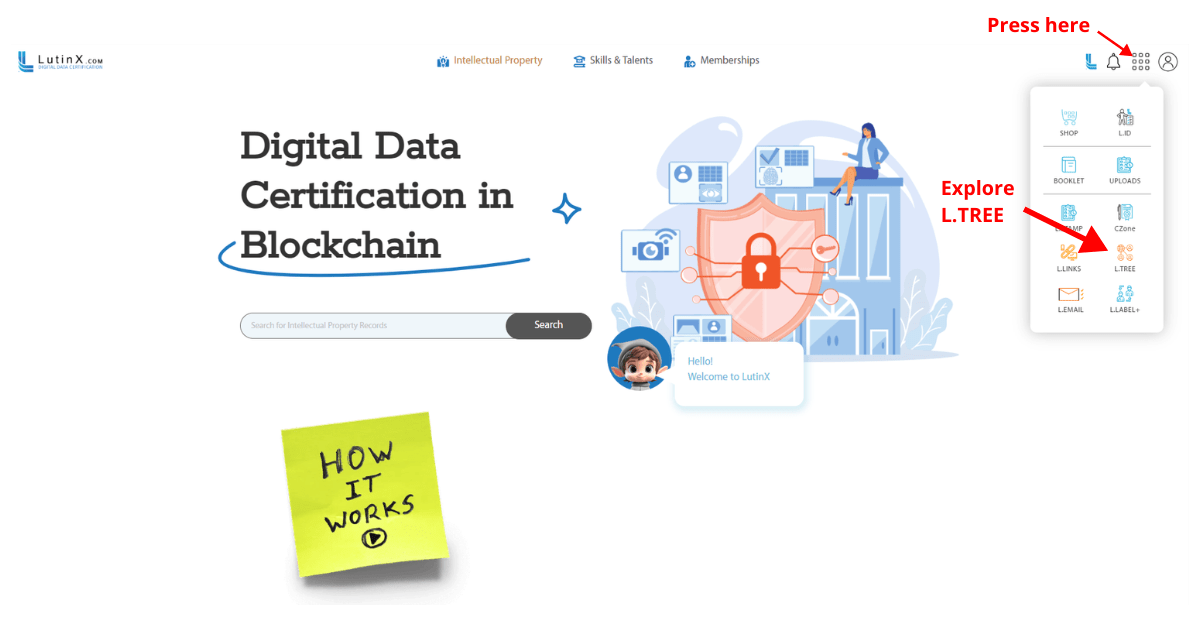
Step 2 — Open the L.TREE application
From the dashboard apps menu, select L.TREE to access the validation workspace.
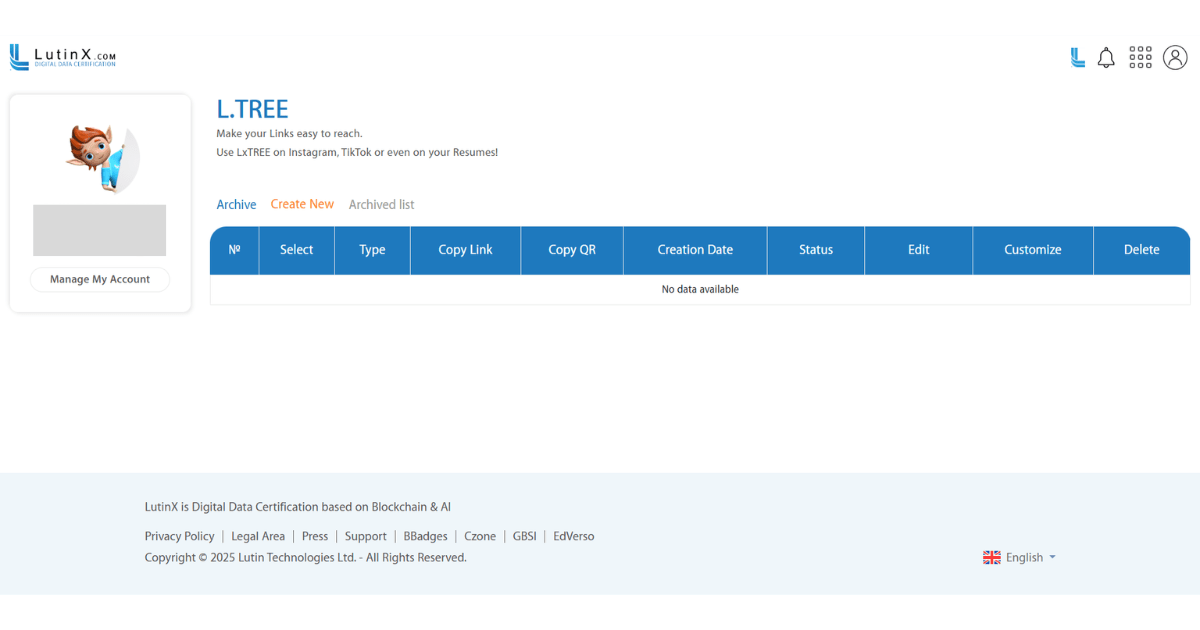
Here you will find:
Create New
Archive
Archive List
If your plan does not include L.TREE, you will be prompted to activate a package or upgrade in the SHOP.
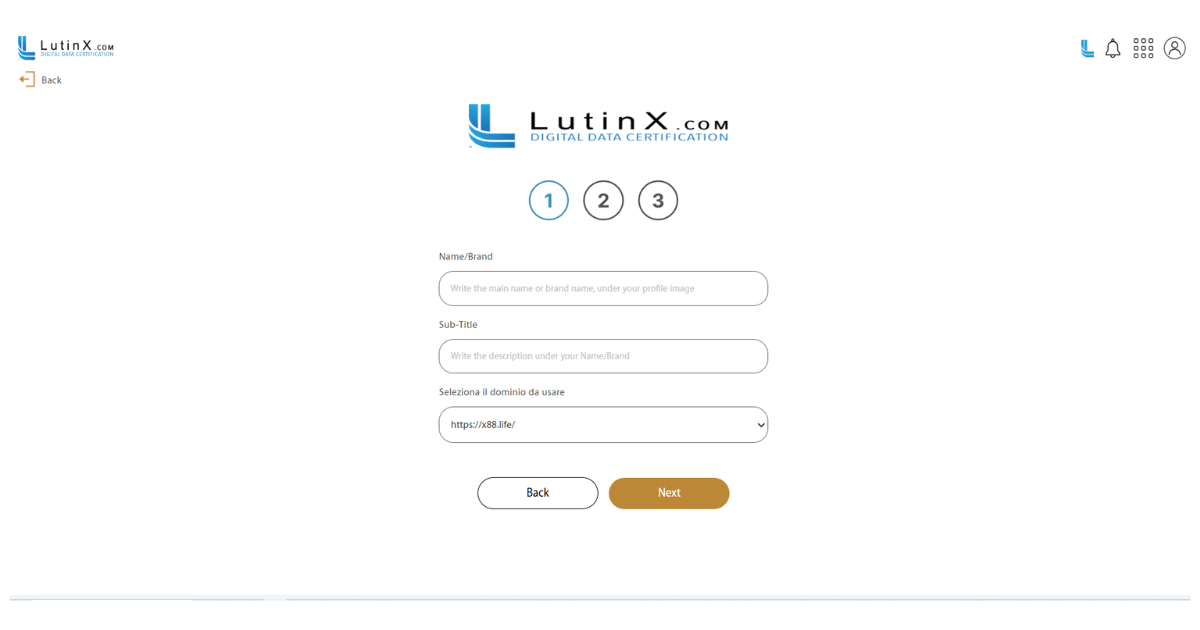
Step 3 — Start creating your L.TREE
On page 1 you set the main identity of your L.TREE:
Name/Brand – the main name shown on your page
Sub-Title – a short description under the name (e.g. “Digital Consultant”)
Select the domain to use – choose the base URL (e.g. https://x88.life/)
Click Next to continue.
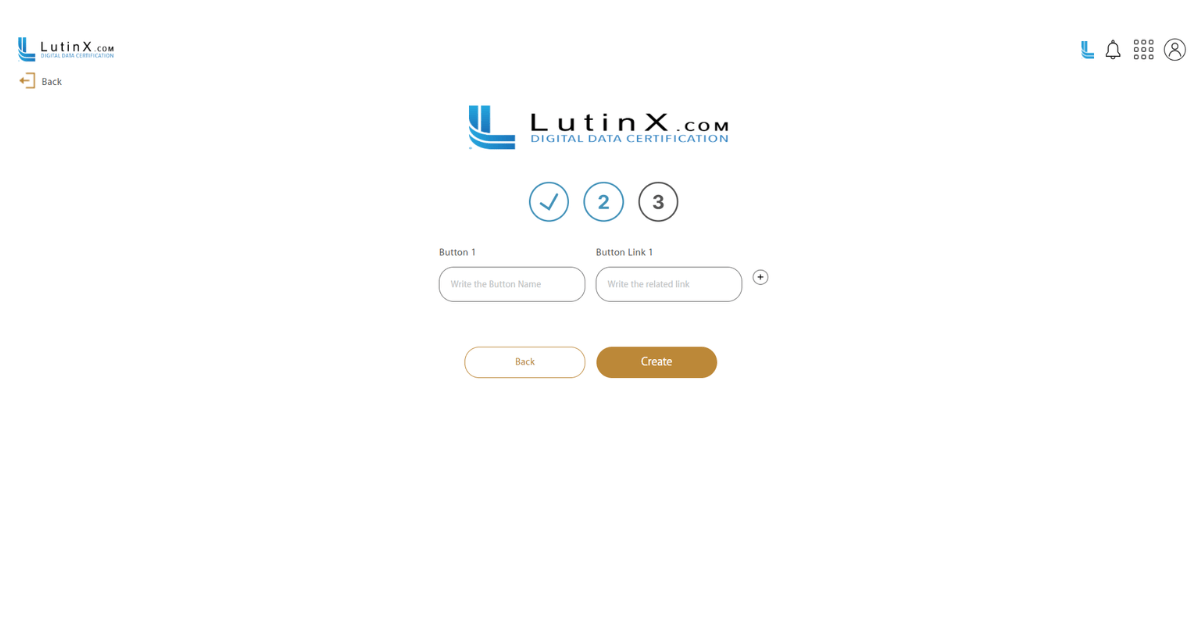
Step 4 — Add your buttons and links
On page 2 you add the buttons that will appear on your L.TREE:
In Button 1, write the button label (e.g. “Instagram”, “Portfolio”, “Contact”)
In Button Link 1, paste the related URL
Use the ( + ) icon to add more buttons and links
When finished, click Next.
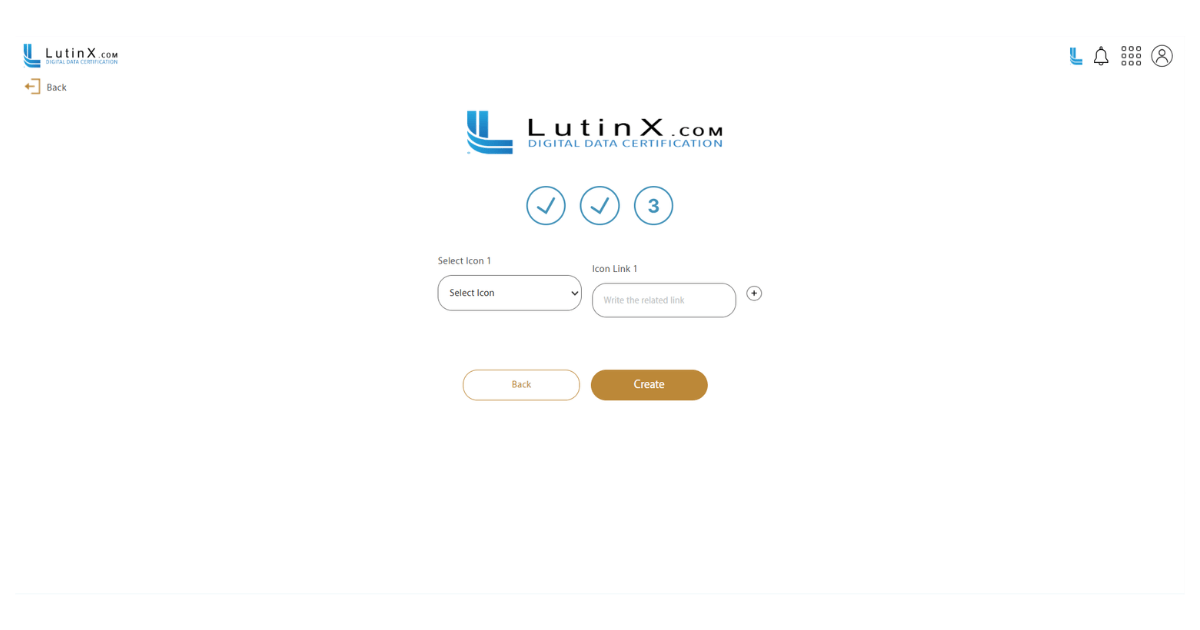
Step 5 — Add icons and related links (optional)
On page 3 you can associate icons with specific links:
Choose an icon from the Select Icon menu
Add the Icon Link for that icon
Use the ( + ) icon to add additional icons and links
Click Create to generate your L.TREE.
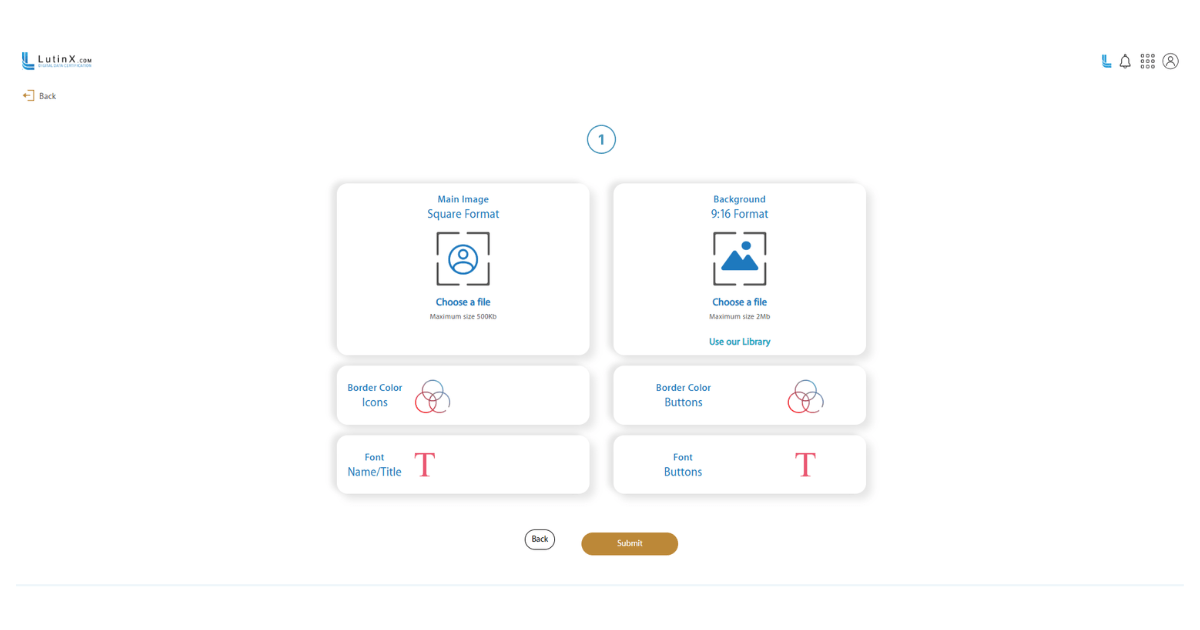
Step 6 — Manage and optionally customize your L.TREE
Back in the L.TREE dashboard you will see your new entry with:
Type, Copy Link, Copy QR, Status, Edit, Customize, Delete
From here you can:
copy your L.TREE URL or QR code
edit buttons and links
use Customize to change images, colors, fonts and visual layout (screen with Main Image, Background, Border Color, Font, etc.)