How to Use L.ID
Step 1 — Create or access your personal account
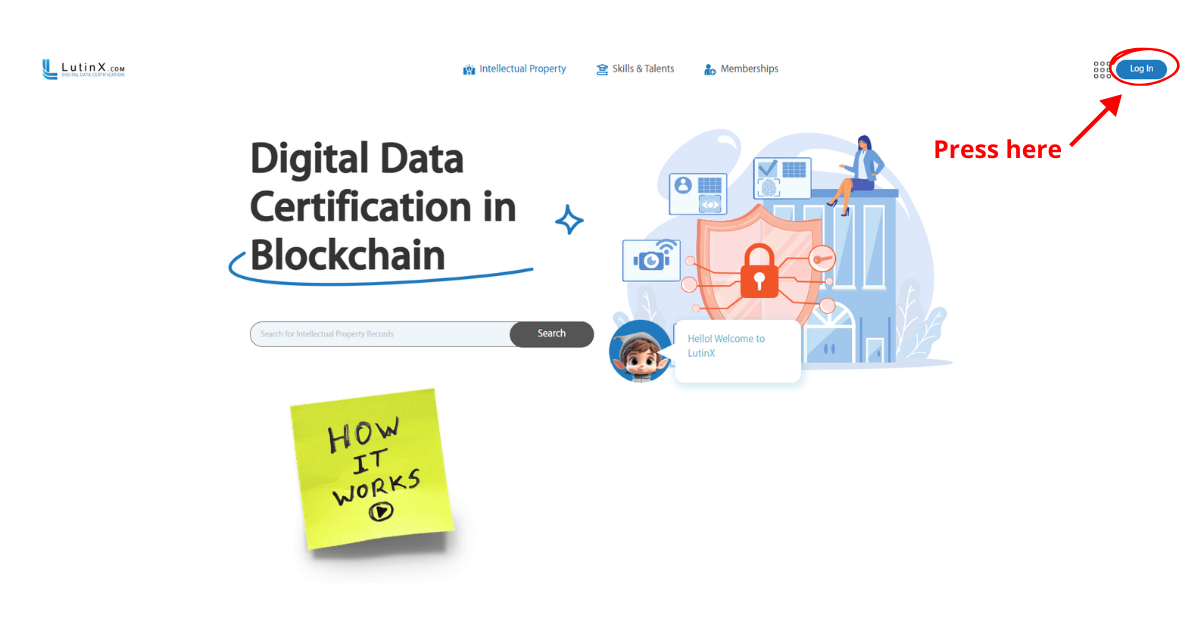
To use L.ID you must have a personal LutinX account.
If you create a new account, completing KYC verification is recommended to become a fully identified user and unlock all L.ID features, including trusted identity sharing.
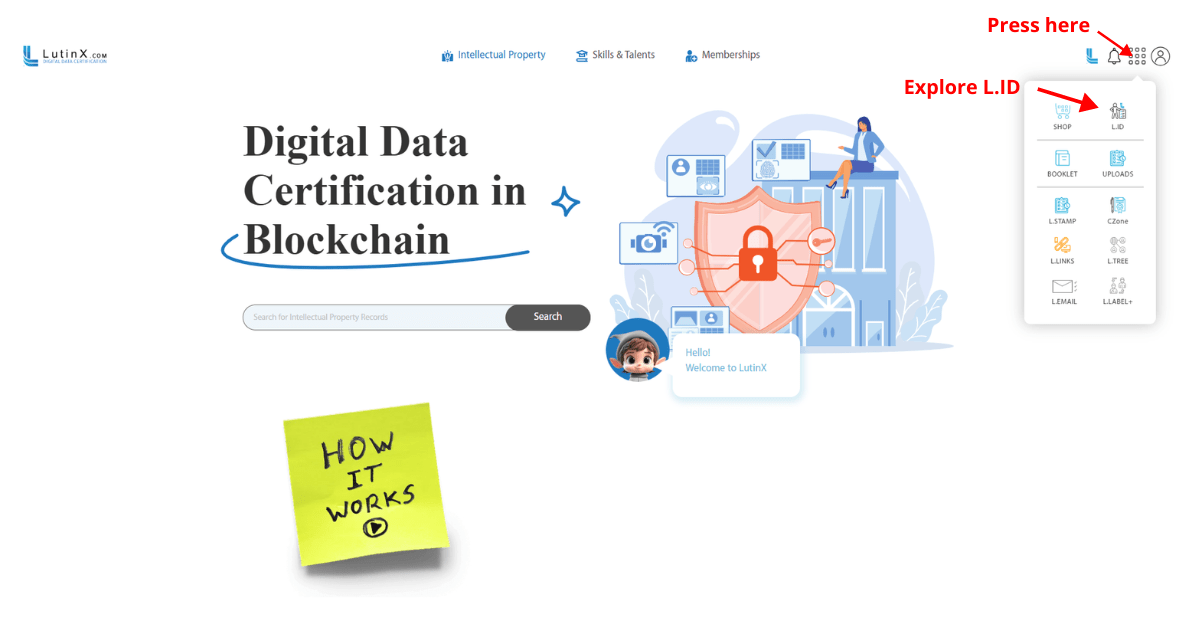
Step 2 —Access L.ID from your dashboard
Once inside your account:
Open your main dashboard
Locate the application panel on the right
Select L.ID
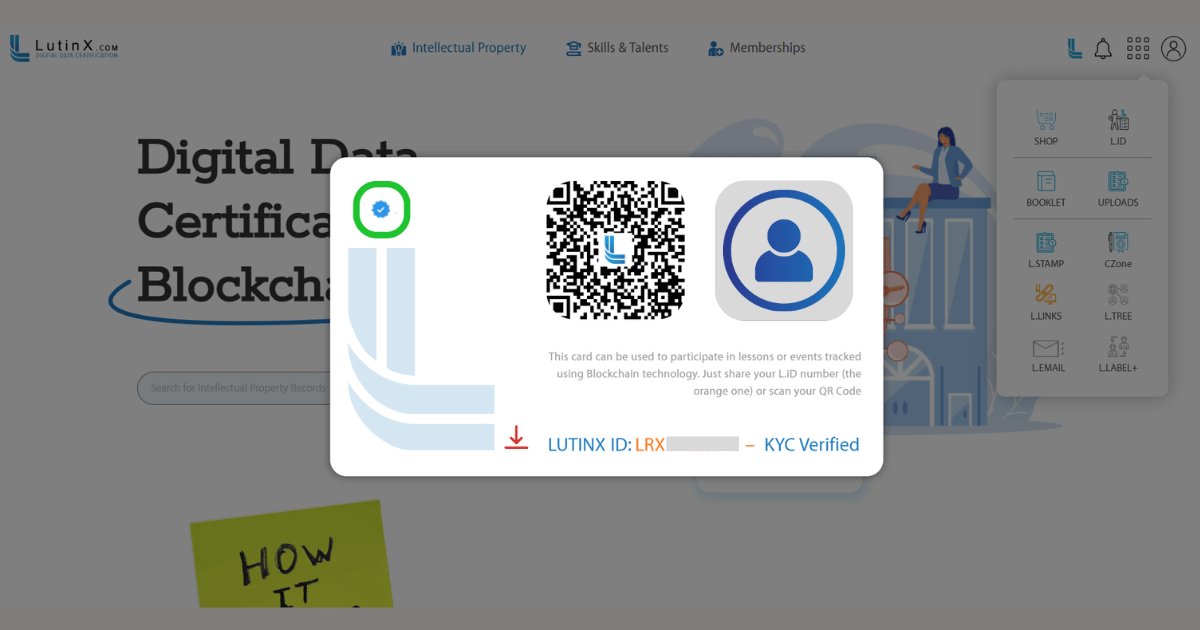
Step 3 — View your L.ID identity panel
Inside L.ID, you will see:
Your profile photo (or placeholder until uploaded)
LutinX ID number (LRX…)
Verification status (KYC badge, if completed)
Your personal QR Code — used to share identity securely
Basic identity details associated with your profile
Links to download or share your digital ID card
This panel represents your official LutinX identity, used for authentication, onboarding, and verification processes across the ecosystem and integrated services.
Step 4 — Use your L.ID for trusted authentication and verification
Your L.ID can be scanned or shared to:
Organizations will only receive the information you explicitly authorize.
Step 5 — Maintain and update your identity information
You can update your photo, add missing information, or complete verification steps when needed.
L.ID ensures that your identity remains accurate, protected, and under your control.