Follow the steps below carefully and use the screenshots as a reference:
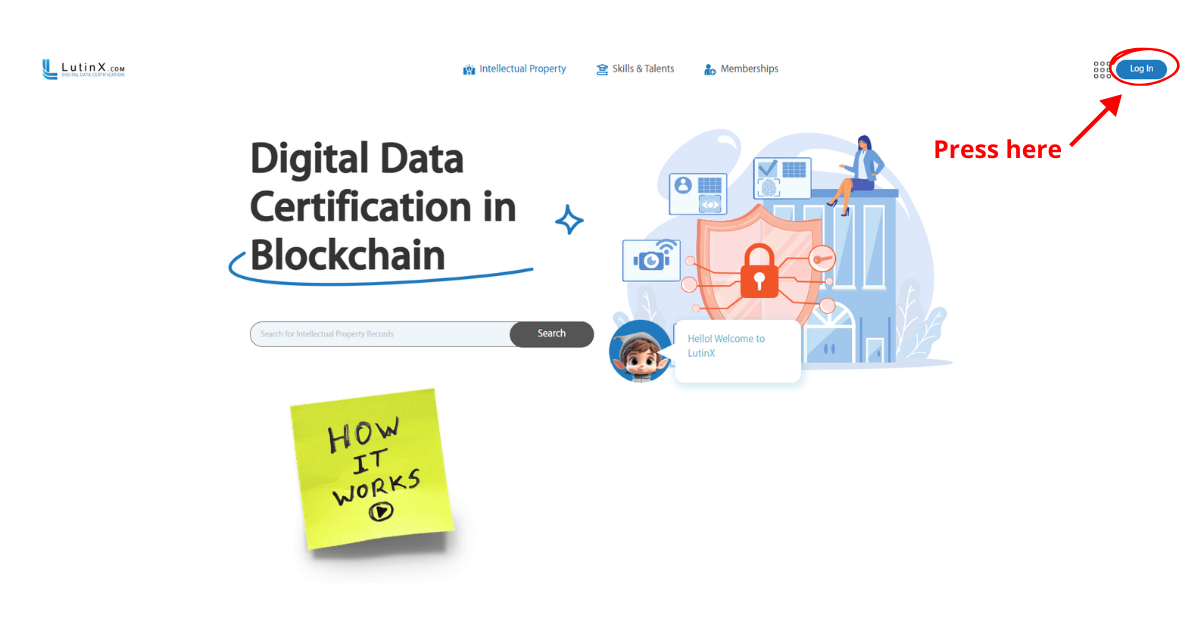
Step 1 — Create or access your account
Log into your LutinX account, or register for free if you don’t have one.
Private users start with 33 registrations, which can be upgraded to 100 by completing KYC.
If you are a business or professional, you will need to purchase a license suitable for your usage.
(👉 go to licenses page).
👉 Tip: completing KYC unlocks more registrations and speeds up access to advanced features.
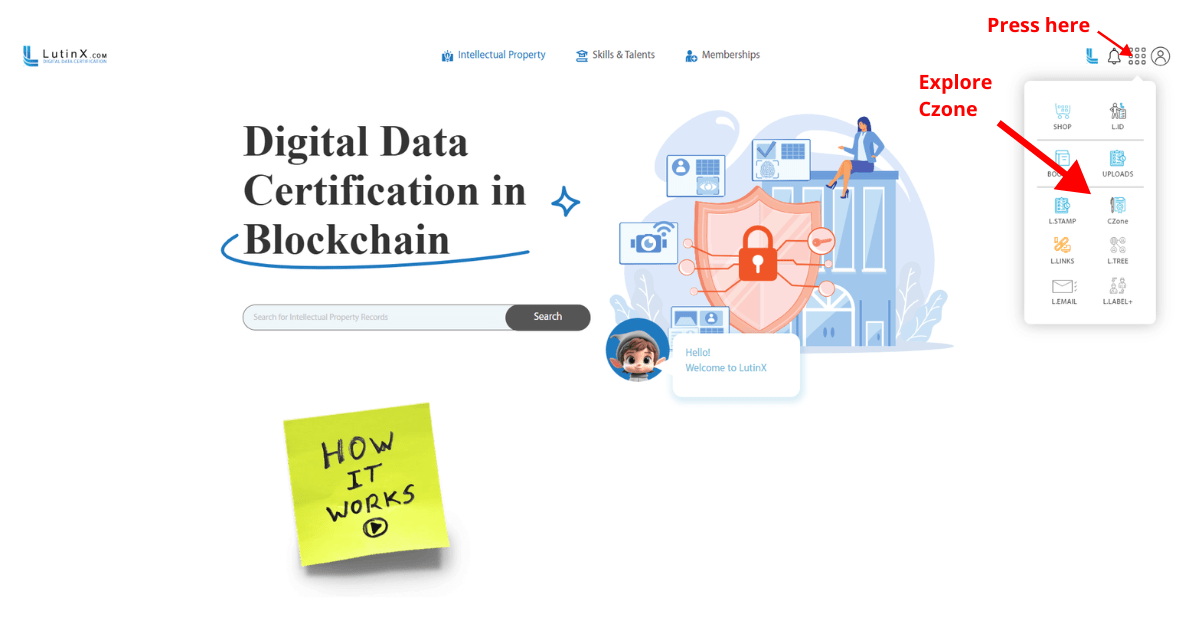
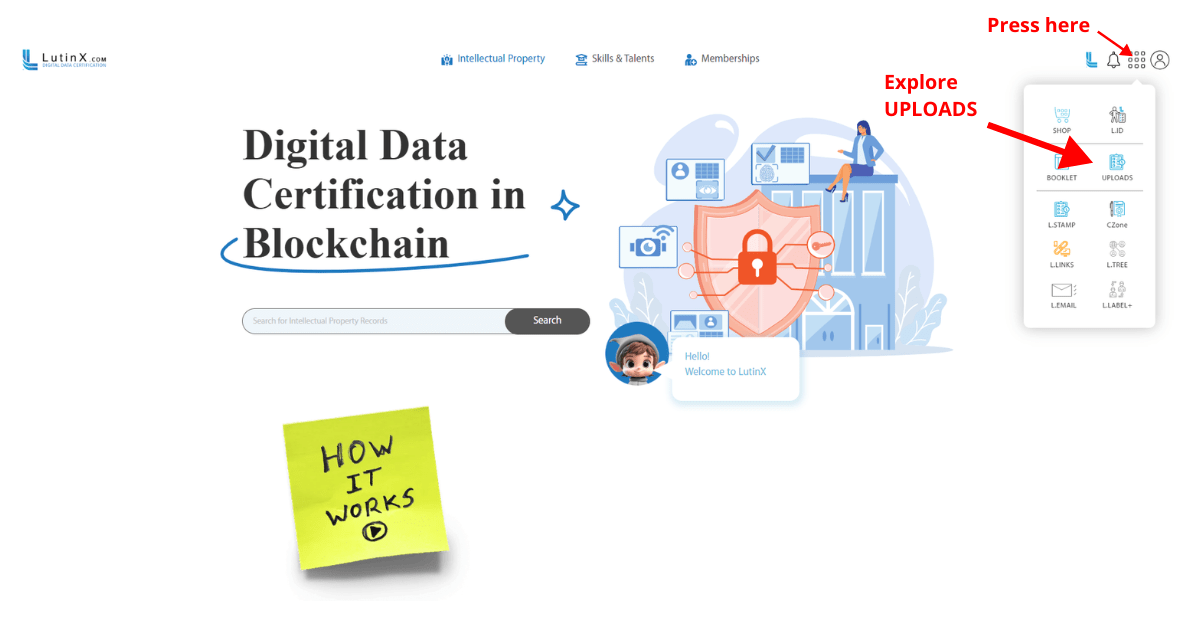
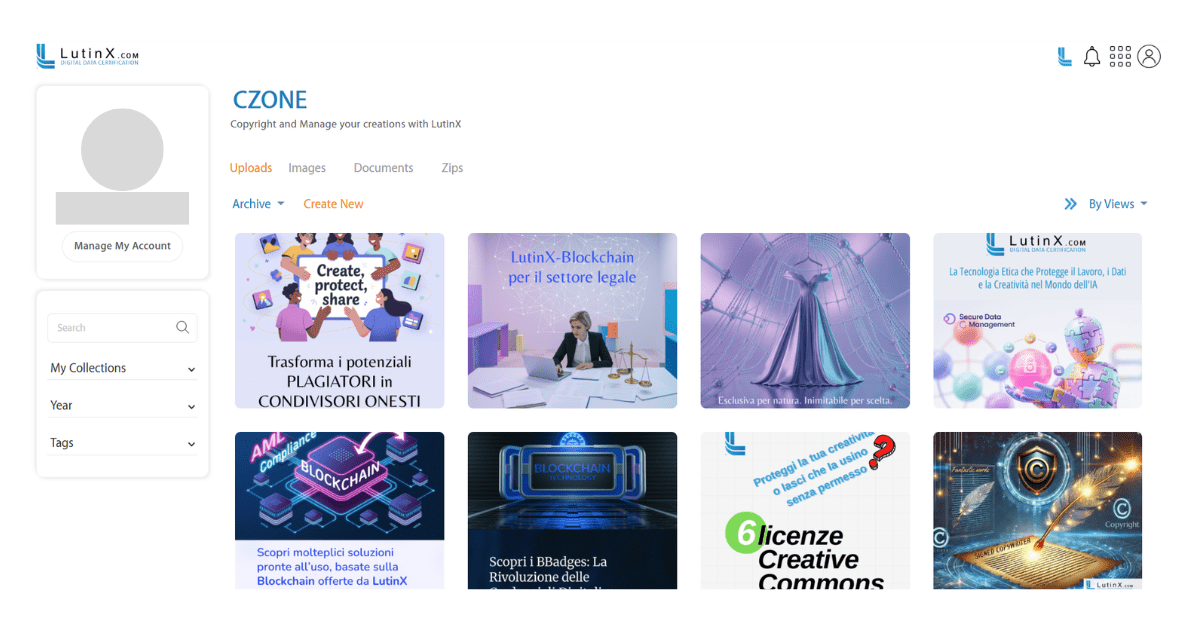
Step 2 — Open CZone from your dashboard
From your main dashboard, click the app menu and select CZone.
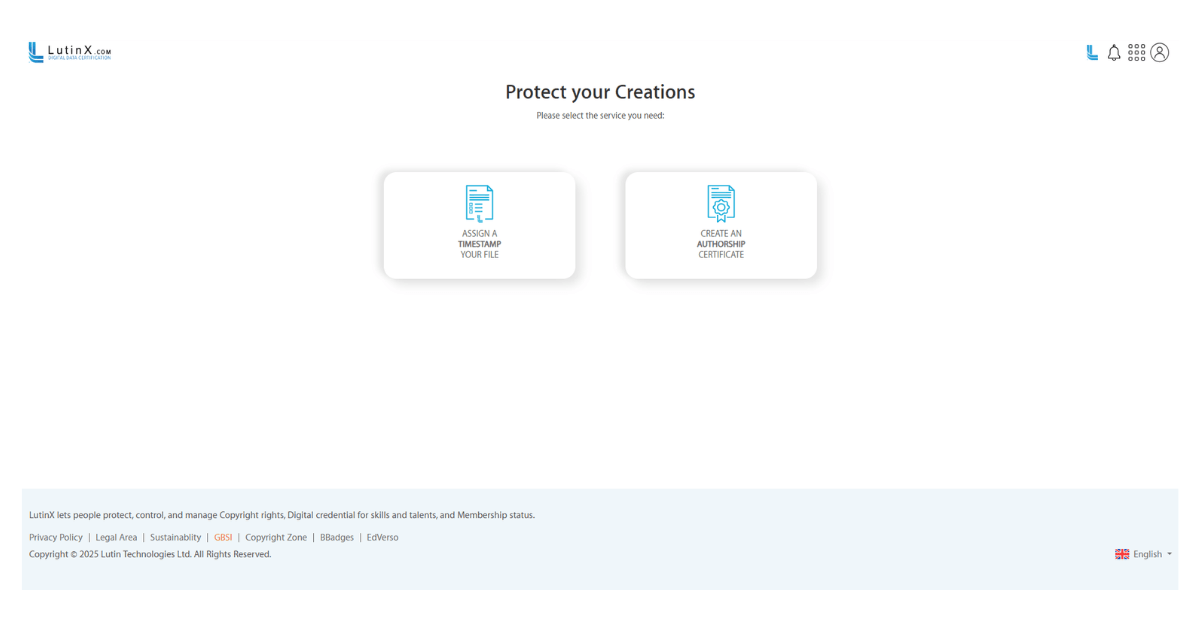
Step 3 — Choose your service: Timestamp or Authorship Certificate
When opening CZone, you will see two main options:
Assign a Timestamp
Creates an official proof of time — ideal for drafts, declarations, or early versions.
Create an Authorship Certificate
Issues the full authorship certificate with cover, metadata, QR, and license options.
👉When to choose what?
Timestamp = fast, minimal, proof of existence at a given date.
Authorship Certificate = complete ownership and authorship proof, recommended for finished works.
⏱️ FIRST CHOICE: Timestamp Certification
Creates a legally valid timestamp linked to your file.
It proves that the file already existed at a specific date and time.
Ideal for drafts, preliminary documents, internal work, or when you need a simple evidence of existence.
Faster and lighter, without assigning authorship data.
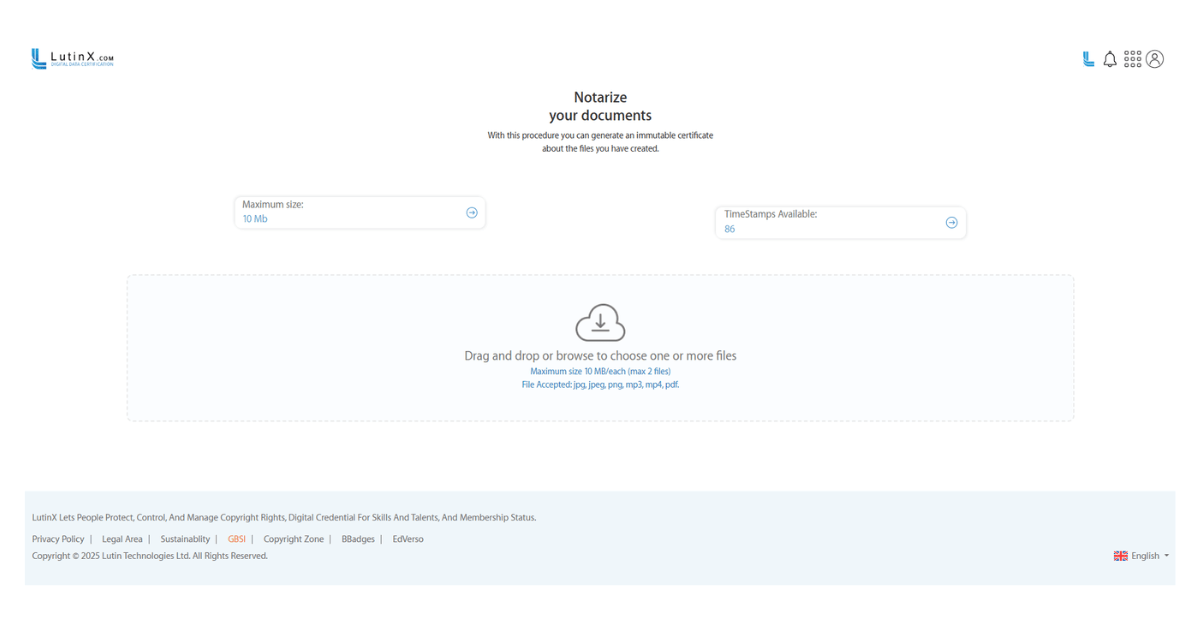
If you only need to prove the existence of a file at a specific date and time, you can use the Timestamp option in CZone. This process is fast, simple, and provides a legally valid blockchain record of your file without adding author details.
F1 – Choose the Timestamp option
From the CZone dashboard, select “Assign a Timestamp”.
This will open the upload screen where you can notarize your file.
F2 – Upload your file
Drag and drop your document or select it from your computer.
Maximum size: 10 MB per file (up to 2 files per operation).
Accepted formats: jpg, jpeg, png, mp3, mp4, pdf.
F3 – Confirm and deposit
Once the file is uploaded, click Deposit.
CZone will instantly generate a legal timestamp stored on blockchain.
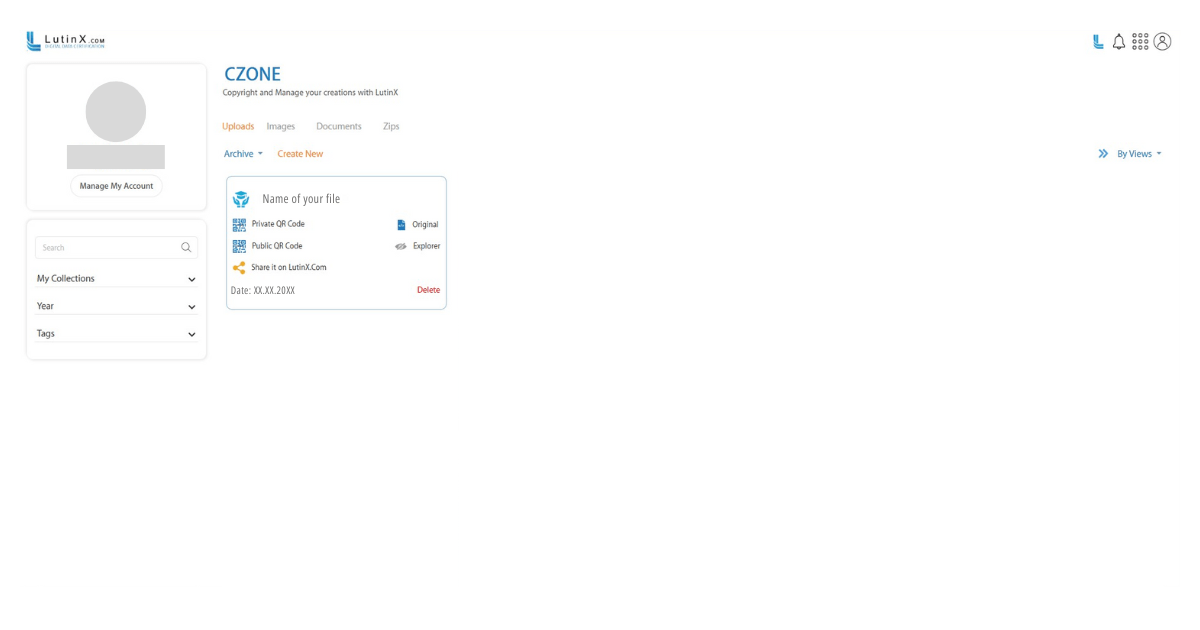
F4 – View your Timestamp Certificate
To check your notarized files, go to the Uploads section in your dashboard.
Here you will find:
👤 SECOND CHOICE: Authorship Certificate
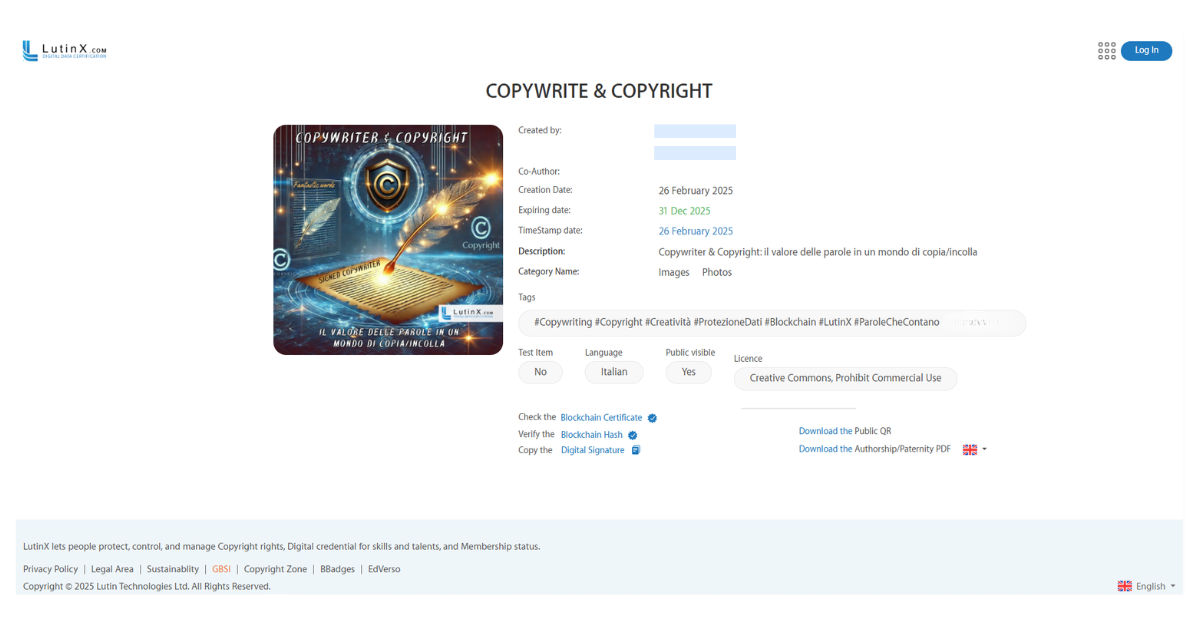
Generates a complete authorship/paternity certificate.
Includes author details, file hash, blockchain ID, digital signature, and legal timestamp.
Recommended for final works, publications, artworks, software, or anything you want to share and officially register under your name.
This certificate will later allow you to transfer ownership or add specific CCommons licenses.
👉 Both options notarize your file on the blockchain, but the Authorship Certificate provides stronger protection and is usually preferred when dealing with creative or intellectual property.
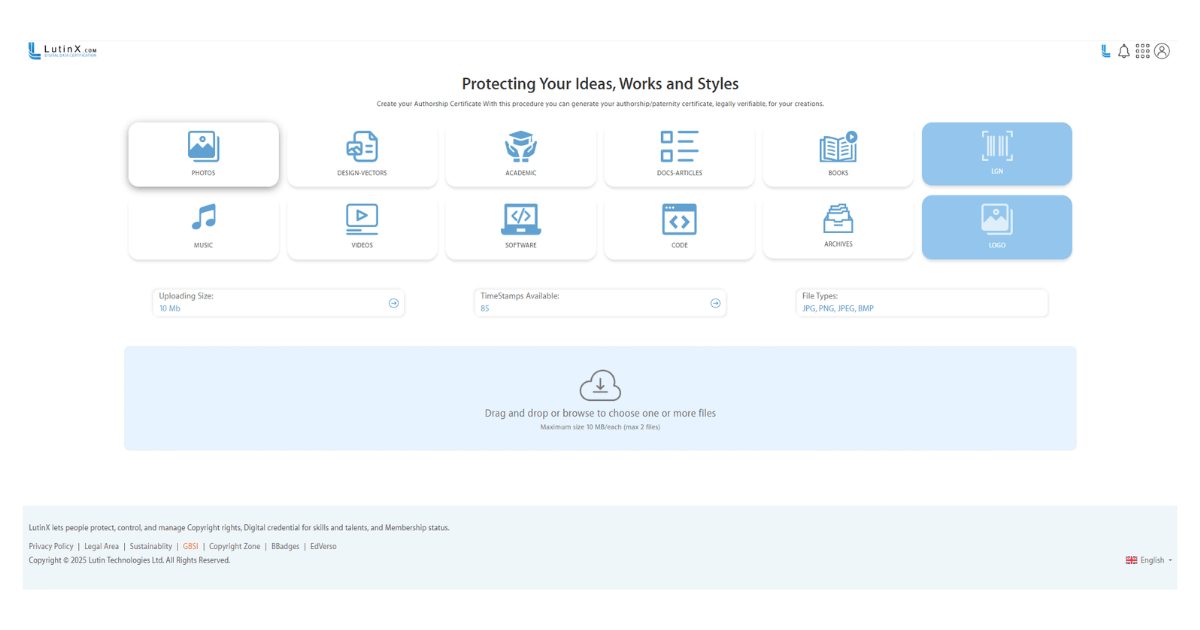
Step 4 — Select the file category
CZone offers a grid of categories to better classify your work (screenshot: Protecting Your Ideas, Works and Styles):
📷 Photos – photographic works, images, visual shots.
🎨 Design & Vectors – illustrations, graphics, vector projects.
🎓 Academic – research papers, theses, educational content.
📑 Docs & Articles – professional documents, reports, articles.
📚 Books – e-books, manuscripts, literary works.
🎶 Music – songs, soundtracks, audio files.
🎬 Videos – films, short videos, creative productions.
💻 Software – applications, programs, executable files.
👨💻 Code – source code, scripts, databases.
🗂 Archives – compressed files, grouped projects.
🖼 Logo – personal or corporate logos.
🔗 LGN (LutinX Global Number) – the new ISBN for books and publications (magazines, journals).
👉 Choosing the correct category ensures your certificate displays the work consistently across CZone, and adds clarity when the QR code, blockchain record, or certificate is shared with third parties.
Step 5 — Upload your files
Check the info bar below before uploading:
Uploading Size (10 MB max each)
Timestamps Available (your remaining balance)
Accepted File Types (JPG, PNG, PDF, DOCX, AI, PSD, MP3, MP4, ZIP, etc.)
Drag and drop your files into the upload box, or browse manually.
👉 Best practices:
Always upload the original version .
Notarize each new version of your work for clear history.
If your format is unsupported, compress it into a ZIP archive.
Step 6 — Fill out the metadata
When creating an Authorship Certificate with CZone, the system will guide you through several steps to enter the metadata of your work. This information will appear in your blockchain certificate and ensures that your file is correctly attributed and legally verifiable.
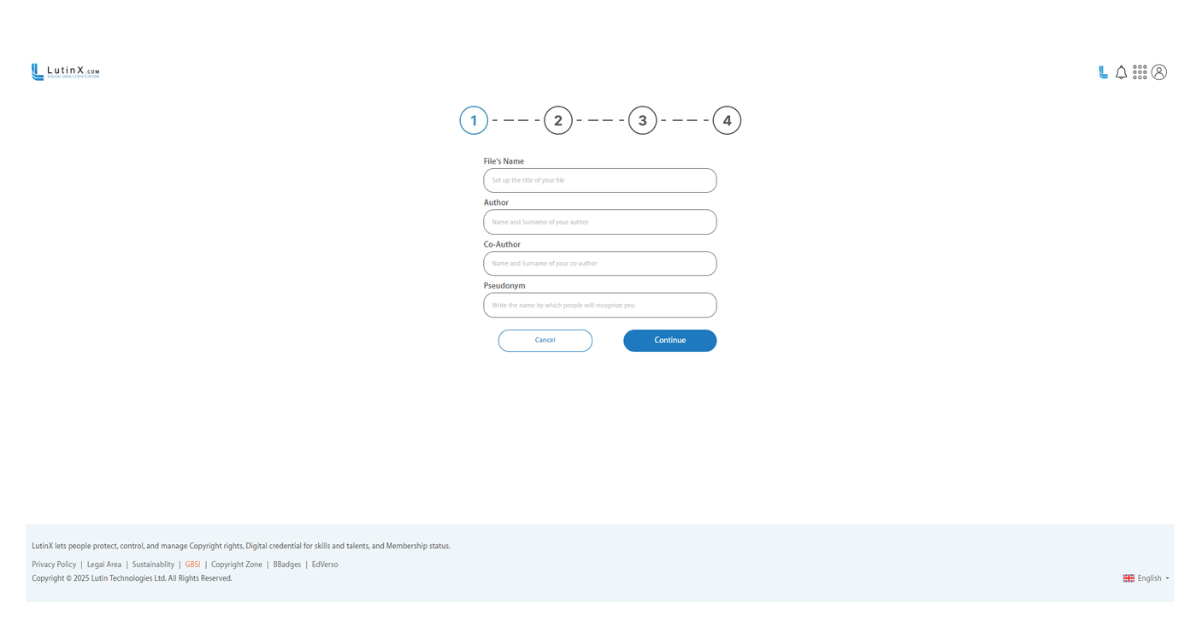
📌 Step 6.1 — Work Details
Here you need to enter the main information about your creation:
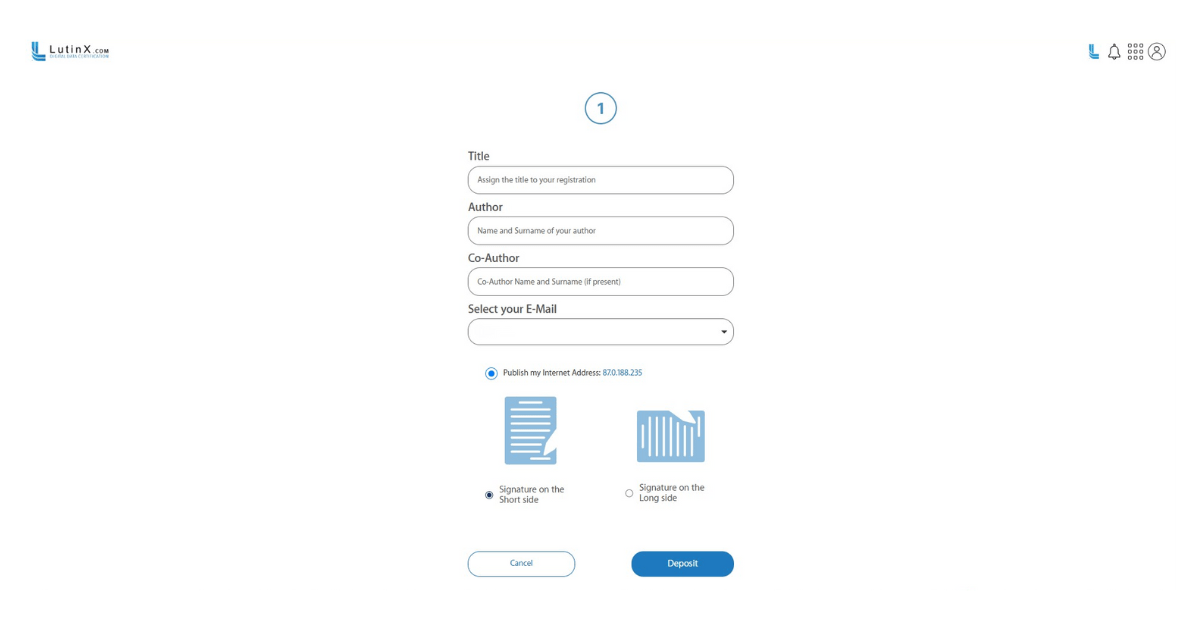
File’s Name – choose a clear and descriptive title for your file.
Author – your full name.
Co-Author – (optional) if the work was created with someone else.
Pseudonym – (optional) the name you want to be recognized with, if different from your real name.
Click Continue to proceed.
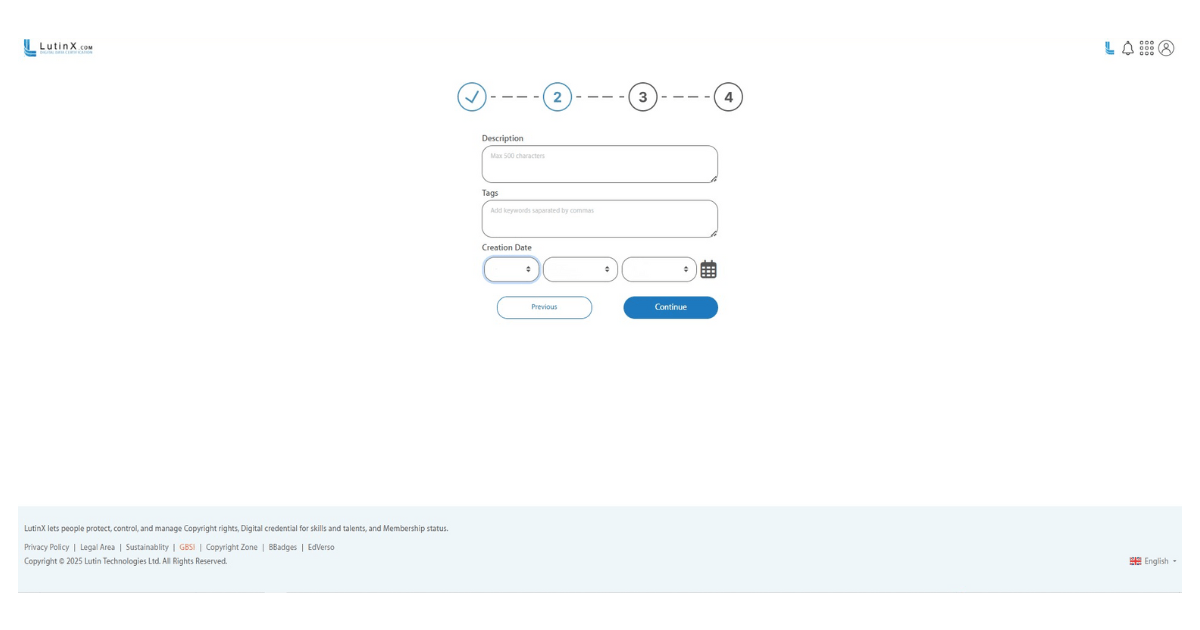
📌 Step 6.2 — Description and Tags
In this step, you can enrich your registration with more context:
Description – add a short description (up to 500 characters) that summarizes your work.
Tags – insert relevant keywords (comma separated) to categorize your work.
Creation Date – indicate the date when the work was originally created.
This information helps in cataloguing and makes your certificate easier to identify and search.
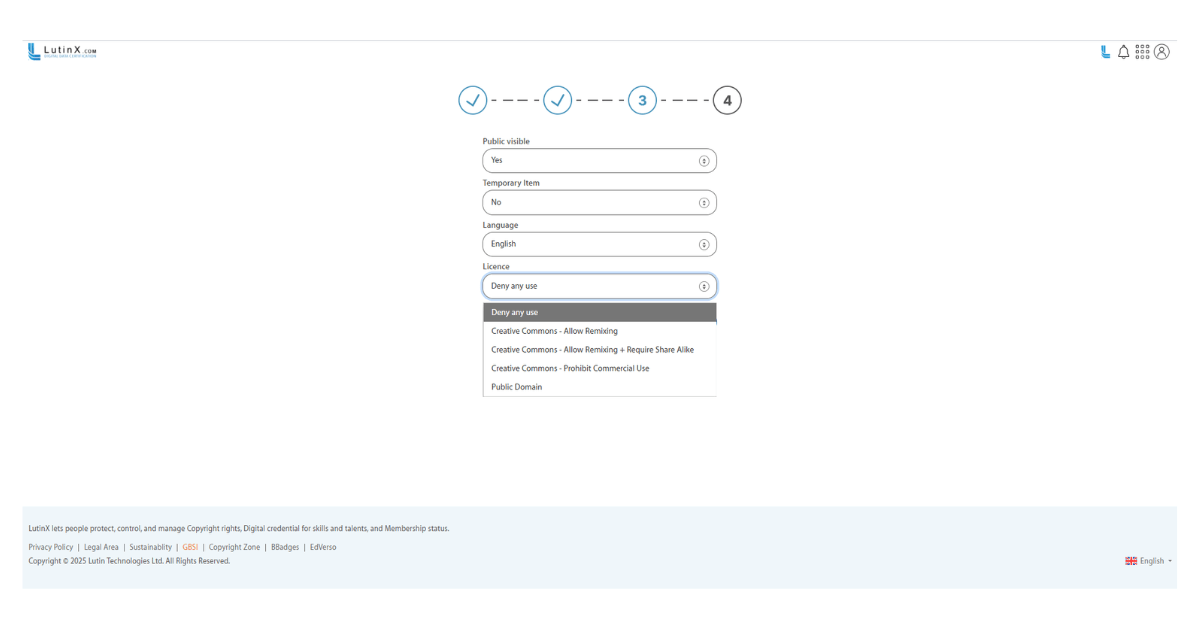
📌 Step 6.3 — Visibility and License
Here you define how your work can be shared and used:
Public Visible – choose if your certificate is visible publicly or kept private.
Temporary Item – decide if the registration is temporary.
Language – select the language of your work.
License – choose among different usage rights:
Deny any use
Creative Commons – Allow Remixing
Creative Commons – Allow Remixing + Require Share Alike
Creative Commons – Prohibit Commercial Use
Public Domain
👉 This step is crucial to define how others can interact with your creation.